
How To
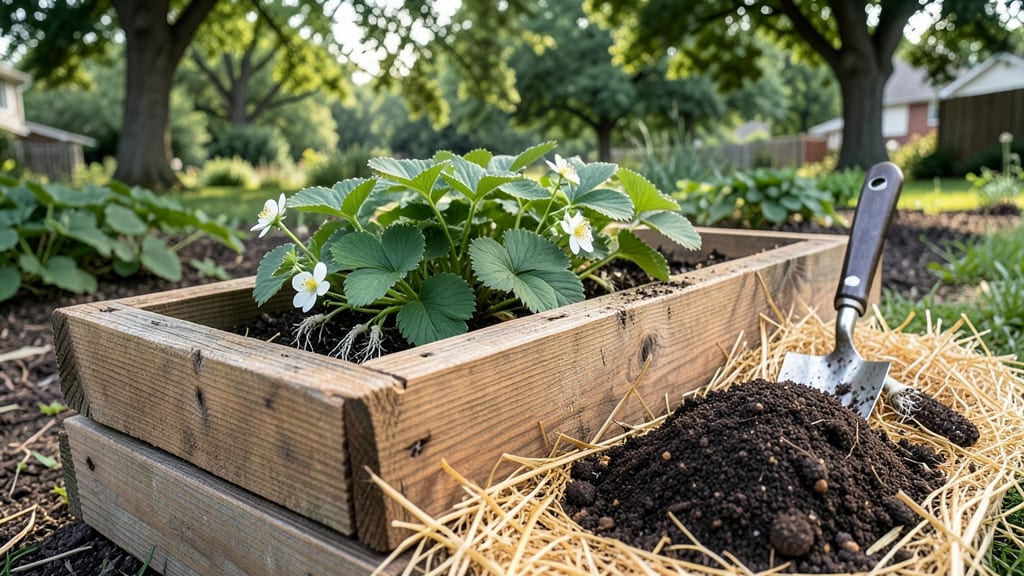
Strawberries spilling over the edges of your planter by June. 🌱 The secret isn’t fancy containers—it’s how you layer soil and space for those sweet red jewels to thrive. I’ve turned old pallets, wooden crates, and even repurposed gutters into strawberry factories that produce fruit for months, not weeks.
Start with a container at least 12 inches deep—strawberries need room for roots and soil layers. Fill the bottom with 3-4 inches of coarse material (gravel or broken pottery) for drainage, then alternate 2 inches of compost with 2 inches of potting mix.
This layered approach keeps roots happy while preventing rot. Choose a spot with 6-8 hours of sunlight—shadier areas mean fewer berries.
By summer, you’ll be harvesting pint-sized strawberries every few weeks, not just one big flush. The key is consistent watering at the soil line (never overhead) and removing runners to focus energy on fruit.
Even small balconies work—just scale the container size. No more buying expensive flats of berries when you’ve got a planter producing them year-round.
Works for hanging planters, vertical towers, or ground-level beds. The same principles apply—just adjust the container depth. Here’s how to set yours up without breaking the bank or your back.
📚 In This Guide
- What you need
- Instructions
- Tips and common mistakes
- Wrapping up and next steps
What you need
- ● Planter container: At least 12–18 inches deep (strawberries need root space!)
- ● Width/length based on desired yield (e.g., 12" x 12" for 4–6 plants or larger for more).
- ● Drainage holes (if using a pot or container).
- ● Strawberry plants: June-bearing, everbearing, or day-neutral varieties (check local climate zones).
- ● 4–6 plants per square foot (adjust for container size).
- ● Soil layers: Gravel or pebbles (1–2 inches) (for drainage at the bottom).
- ● Well-draining potting mix (avoid garden soil—it compacts!).
- ● Compost or aged manure (1–2 cups per plant) (for nutrients).
- ● Mulch: Straw or shredded leaves (2–3 inches) (to retain moisture and suppress weeds).
- ● Gloves (to protect your hands from soil and thorns).
- ● Trowel or small shovel (for layering soil and planting).
- ● Watering can or hose with gentle spray (strawberries hate soggy roots!).
- ○ Optional: Slow-release fertilizer (follow package instructions).
- ● Plant supports (stakes or cages) (if growing heavy varieties).
- ● Clear plastic dome or cloche (for cold climates, to extend the season).
- ● Sunlight: 6–8 hours of full sun daily (partial shade in hot climates).
- ● Climate check: Plant in spring or early fall (avoid frost if possible).
- ● Space planning: Ensure your planter is easily accessible for harvesting and maintenance.
Step-by-step instructions for building a strawberry planter
Here's the method I rely on to create a thriving strawberry planter that delivers sweet harvests season after season.
🪴 Step 1: Select and Prepare the Container
Choose a container with drainage holes and at least 12 inches deep—strawberries need room for roots to spread. I prefer wooden boxes or fabric grow bags because they allow air circulation and prevent soil compaction. If using a decorative pot, drill additional holes along the bottom to ensure excess water escapes.
Clean the container thoroughly with a 10% bleach solution to kill any pathogens. Rinse well and let it dry completely before adding soil. This prevents fungal diseases that can rot strawberry roots before your plants even establish. Place a 1-inch layer of gravel or broken pottery at the bottom to improve drainage further.
🌱 Step 2: Layer the Soil for Optimal Growth
Strawberries thrive in well-draining, slightly acidic soil with a pH between 5.5 and 6.8. Start with a 2-inch layer of coarse perlite or pumice at the bottom to prevent waterlogging. This layer ensures roots stay aerated and don’t suffocate in heavy soil.
Next, add a 4-inch layer of high-quality potting mix mixed with compost (I use a 70/30 ratio). This blend provides nutrients while maintaining loose texture. Avoid garden soil—it compacts easily in containers and can harbor pests. Press down lightly to create a firm base for the next layer.
🌿 Step 3: Plant Strawberry Crowns Correctly
Place strawberry crowns (the fleshy base where leaves meet the roots) on top of the soil layer, spacing them 6 inches apart in rows. The crown should sit just above the soil line—burying it too deep causes rot, while leaving it exposed leads to desiccation. Gently fan out the roots before pressing the crown into place.
Cover the crowns with an additional 2 inches of potting mix, leaving the top leaves exposed. Water immediately after planting to settle the soil around the roots. You’ll know it’s right when the soil looks moist but not soggy, and the crown remains visible above the surface.
☀️ Step 4: Provide Light, Water, and Maintenance
Strawberries need 6-10 hours of sunlight daily for optimal fruit production. Position your planter in a south-facing spot or under grow lights if indoors. If leaves start stretching toward the light, your planter needs to move closer to the source.
Water deeply 2-3 times per week, ensuring the top 2 inches of soil stay moist but not waterlogged. I use a drip irrigation system to deliver water directly to the roots, which prevents fungal diseases that splashing can cause. Mulch with straw or shredded leaves to retain moisture and suppress weeds.
✂️ Step 5: Prune and Support for Maximum Yield
Once strawberries begin fruiting, remove old leaves and runners to redirect energy to fruit production. I prune weak or yellowing leaves with clean shears, cutting just above a healthy leaf node. This encourages stronger growth and larger berries.
Use straw mulch to protect berries from rotting when they touch the soil. As the season progresses, harvest berries when fully red and slightly soft to the touch. Regular pruning and mulching keep your planter productive for years, with minimal effort after the initial setup.
Tips & tricks for perfect strawberry planters
Here's what nobody tells you about building a strawberry planter that actually thrives year after year.
Container Depth Matters: That 12-inch minimum depth is non-negotiable for strawberries. I've seen shallow decorative pots fail after just one season because roots outgrow the space. If you're using a decorative pot without drainage, drill holes along the sides too—not just the bottom. The roots need room to breathe and access fresh air at all levels.
Soil Layering Secret: The 2-inch perlite/pumice layer at the bottom isn't just for drainage—it creates an oxygen-rich zone that prevents root rot. I've found that skipping this layer leads to soggy soil even with good drainage holes. When mixing your 4-inch potting mix layer, add a handful of worm castings to boost microbial activity without altering the texture.
Crown Placement Precision: That crown should sit just above the soil line—no higher, no lower. I learned this the hard way when my first batch of crowns rotted because I buried them too deep. Use a toothpick to gently press the crown into place, then water immediately. The soil should settle enough to cover the roots but leave the crown exposed. This balance is what prevents both rot and desiccation.
Light Positioning Hack: For maximum sunlight exposure, position your planter so it gets morning sun from the east and afternoon sun from the west. This prevents leaf scorch that can happen with intense midday sun. If your space only gets partial sun, supplement with a grow light for 4-6 hours daily—strawberries will still produce, just with slightly smaller berries.
Pro Tips for Make A Strawberry Planter
- Here's what nobody tells you about building a strawberry planter that actually thrives year after year.
- Container Depth Matters: That 12-inch minimum depth is non-negotiable for strawberries. I've seen shallow decorative ...
- Soil Layering Secret: The 2-inch perlite/pumice layer at the bottom isn't just for drainage—it creates an oxygen-rich...
Frequently asked questions
Got questions about creating your dream strawberry planter? You’re not alone! Here are answers to the most common queries to help you grow like a pro.
What’s the best time of year to plant strawberries in a DIY planter?
For June-bearing varieties, plant in early spring (3–4 weeks before the last frost). Ever-bearing and day-neutral strawberries thrive when planted in spring or late summer. If you’re in a mild climate, fall planting can also work—just ensure soil temps are above 40°F (4°C) for root growth.
Can I use any container for a strawberry planter, or are there specific requirements?
Most containers work, but prioritize depth (at least 6–12 inches), drainage holes, and durability. Avoid plastic that degrades in sunlight or flimsy materials that won’t hold moisture. Repurposed buckets, wooden boxes, or fabric grow bags are great alternatives—just ensure they’re food-safe if edible plants touch the sides.
How often should I water strawberries in a planter, and what’s the ideal soil mix?
Water when the top 1–2 inches of soil feel dry (usually every 2–3 days in summer). For soil, mix 60% potting soil, 30% compost, and 10% perlite/sand for drainage. Strawberries love slightly acidic soil (pH 5.5–6.8). Mulch with straw to retain moisture and suppress weeds.
What are common pests or diseases in strawberry planters, and how do I prevent them?
Watch for slugs, aphids, and powdery mildew. Prevent pests with neem oil or row covers, and space plants 12–18 inches apart for airflow. Rotate crops yearly if reusing containers, and avoid overhead watering to reduce fungal risks.
Can I grow strawberries year-round in a planter, or do they need winter care?
In cold climates, move planters to a sheltered spot or mulch heavily to insulate roots. For extreme winters, dig up plants and store them in a cool, dark place (like a garage) until spring. In warm zones, shade cloth can protect from heat stress. Ever-bearing varieties often produce in fall/winter with proper care!
Wrapping up and next steps
Creating your own strawberry planter is a rewarding project that brings year-round harvests and a touch of creativity to your garden! With the right materials—like containers, soil layers, and those juicy strawberry plants—you’ve got everything you need to grow a thriving patch.
Whether you’re a beginner or a seasoned gardener, this layered approach ensures your berries stay healthy, productive, and delicious.
Now that you’re armed with the soil secrets and step-by-step know-how, it’s time to roll up your sleeves and get planting! Watch your strawberries flourish, and soon you’ll be enjoying fresh, homegrown treats straight from your very own planter. Happy gardening! 🌱🍓