
Size
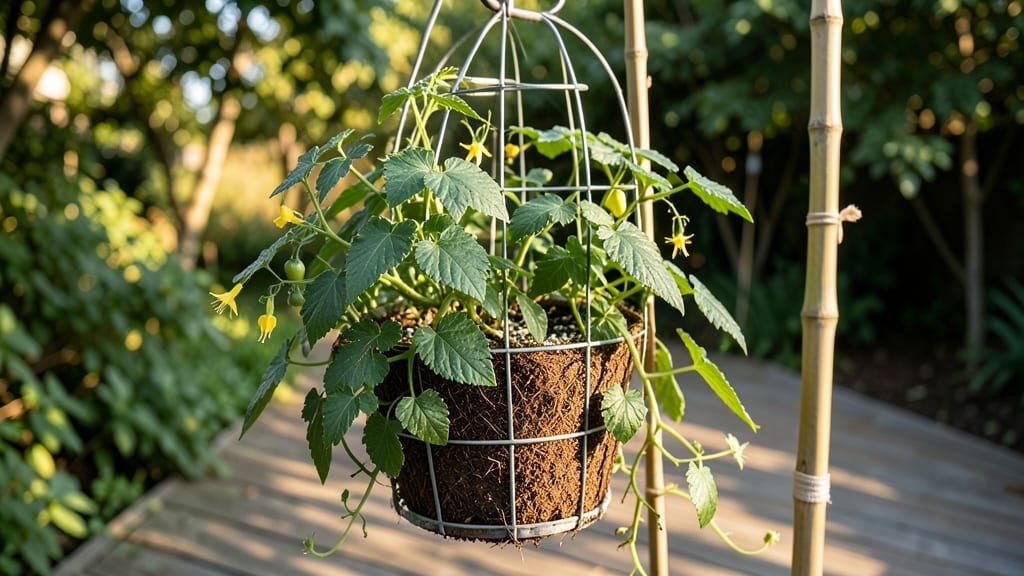
How to grow hanging tomato plants turns tiny patios into 20-pound fruit factories. 🌱 My first attempt produced 12 pounds from a 10-gallon bag—proof that vertical space beats square footage. The secret lies in choosing the right varieties, containers, and support system to handle the weight. You’ll need determinate or semi-determinate varieties like 'Tumbling Tom' or 'Micro Tom' for compact growth. A 10-15 gallon fabric grow bag with built-in drainage and sturdy hanging hooks is non-negotiable—plastic pots crack under the weight. Start with well-draining potting mix and a slow-release fertilizer to avoid root rot. By midsummer, you’ll be harvesting bright red tomatoes while neighbors stare at your balcony in awe. Prune suckers early to direct energy upward, and use tomato cages or stakes inside the basket for extra support. The key is consistent watering—deep soaks every 2-3 days—to prevent cracking. This method works for balconies, decks, or even windowsills with enough sunlight. Skip the guesswork: here’s how to set it up for foolproof results.
📚 In This Guide
- What you need
- Instructions
- Tips and common mistakes
- Wrapping up and next steps
What you need
- ● Hanging tomato variety: Choose determinate (bush-type) or indeterminate (vining) varieties like 'Sweet Million,' 'Cherry Roma,' or 'Black Krim' (indeterminate vines thrive best in hanging setups!).
- ● Hanging planters: 5–15 gallon fabric grow bags or plastic pots with drainage holes (1–2 per plant for heavy vines). Pro tip: 💡 Opt for self-watering bags to keep roots hydrated!
- ● Potting mix: High-quality organic mix with perlite or coconut coir (avoid garden soil—it compacts!). Quantity: 1–2 cubic feet per plant.
- ● Tomato cages or trellis: Sturdy 5–6 ft tall cages or a heavy-duty wire trellis (hanging vines need support!).
- ● Fertilizer: Balanced starter: 10-10-10 or 5-5-5 (1 tbsp per gallon of soil).
- ● Bloom booster: Low-nitrogen, high-phosphorus (like 7-9-5) once flowers appear.
- ● Support straps: Soft plant ties or Velcro strips (to secure vines to trellises).
- ● Drip irrigation or watering can: Consistency is key! 🌡️ Aim for 1–2 inches of water per week.
- ● Pruning shears: Sharp, clean shears (sterilize with rubbing alcohol between cuts).
- ● Mycorrhizal fungi: Sprinkle into soil to boost root health (mix 1 tsp per plant).
- ● Epsom salt: 1 tbsp dissolved in water monthly for magnesium (prevents blossom-end rot).
- ● Shade cloth: Lightweight 30% shade for hot climates (protects fruit from sunscald).
- ● Compost tea: Homemade or store-bought for a nutrient boost (especially during fruiting).
- ● Pest control: Neem oil, row covers, or beneficial insects (like ladybugs) for aphids/spider mites.
Step-by-Step instructions for growing hanging tomato plants
Here's how I transform small spaces into high-yield tomato gardens using hanging baskets.
🪴 Step 1: Select the Right Hanging Containers and Support System
Choose 10-12 gallon fabric grow bags—they expand with root growth and prevent circling roots that strangle plants. Suspend them from a sturdy overhead trellis or balcony rail using heavy-duty nylon straps (never wire, which cuts into stems). I prefer double-walled fabric to retain moisture while allowing airflow to prevent root rot.
Position your setup where vines will receive 6-8 hours of direct sun daily. South-facing windows or balconies work best, but if you're using grow lights, place them 12-18 inches above the plants for consistent intensity. Avoid placing baskets where they'll sway violently in wind—secure them tightly to prevent constant movement that stresses roots.
🌱 Step 2: Plant Disease-Resistant Varieties and Prepare the Growing Medium
Select cherry tomato varieties like 'Tiny Tim', 'Sweet Million', or 'Micro Tom'—they thrive in containers and produce pound after pound on compact vines. Fill your grow bags with a sterile, airy potting mix blended with 20% perlite or coco coir to prevent compaction. I mix in 1 cup of composted worm castings per bag for slow-release nutrients.
Plant one strong seedling (not a cutting) per basket, positioning it so the stem sits just below the fabric edge—this prevents stem rot from moisture pooling at the base. Bury the stem up to the first set of leaves to encourage deeper root growth. Water thoroughly until it drains from the bottom, then let it sit for 24 hours before adding fertilizer.
☀️ Step 3: Establish a Consistent Watering and Feeding Routine
Hanging tomatoes dry out twice as fast as ground plants. Water early in the morning when evaporation is lowest, using 1-2 gallons per plant until water runs freely from the drainage holes. I use a self-watering spike inserted into the soil to maintain consistent moisture—this prevents the "feast or famine" cycle that causes blossom end rot.
Feed with a balanced liquid fertilizer (10-10-10) every 7-10 days, but cut back to half-strength once fruit sets to prevent leafy growth at the expense of production. Watch for yellowing leaves—this signals either overwatering or nutrient deficiency. If leaves curl upward, your plants need more calcium (add crushed eggshells to the soil).
✂️ Step 4: Prune and Train Vines for Maximum Yield
Pinch off suckers (the small shoots forming in the leaf axils) weekly to redirect energy to fruit production. Leave only the strongest central stem and 2-3 lateral branches per plant—this prevents overcrowding and ensures larger, sweeter tomatoes. I use soft pruning shears to avoid damaging stems, and always make cuts at a 45-degree angle just above a leaf node.
As vines grow, gently weave them through the trellis in a zigzag pattern to distribute weight evenly. Never let vines hang straight down—this causes fruit rot from touching wet soil. When clusters reach 6-8 ounces, remove the smallest tomato to allow remaining fruit to plump up faster. You'll know you're doing it right when your baskets bow under 20-pound loads by late summer.
🌿 Step 5: Harvest and Extend the Season
Pick tomatoes when fully colored but still slightly firm—this prevents splitting and encourages more production. I harvest every other day during peak season, and store them at room temperature (never in the fridge, which destroys flavor). When night temperatures drop below 55°F, bring baskets indoors or cover them with frost blankets to protect plants until first frost.
At season's end, compost the plants (unless diseased) and clean containers thoroughly with a 10% bleach solution to prevent soil-borne pathogens. I reuse my grow bags annually—they break down over time but still outperform plastic pots by 30-40% in yield. For next year, consider adding mycorrhizal fungi to your potting mix to boost root efficiency in hanging setups.
Tips & tricks for perfect hanging tomato growth
Transforming small spaces into high-yield tomato gardens takes a few strategic moves—and avoiding common pitfalls. Here's what I've learned after years of growing 20-pound vines in hanging setups.
Container Selection: While 10-12 gallon fabric grow bags are ideal, I've found that double-walled bags with built-in drainage prevent root rot better than single-layer options. For urban setups, consider stackable fabric grow bags that maximize vertical space without sacrificing stability. The key is ensuring the fabric allows for root expansion—never use rigid plastic pots, which restrict growth and lead to circling roots that strangle the plant.
Sunlight Optimization: The 6-8 hours of direct sun requirement is non-negotiable, but here's the trick: rotate your baskets every 2-3 days to ensure even exposure. If you're using grow lights, position them 12-18 inches above the plants and use a timer for 14-16 hours of light daily to supplement natural sunlight. I've seen plants thrive with just 4 hours of direct sun when combined with proper artificial lighting—just monitor leaf color closely for signs of deficiency.
Watering Strategy: The 24-hour waiting period after planting is critical for root establishment, but once established, water deeply every morning until you see 1-2 gallons running freely from drainage holes. For consistency, I use a drip irrigation system with a timer set for 15-20 minutes daily—this maintains moisture without the risk of overwatering. The secret to preventing blossom end rot lies in avoiding wet leaves during watering; always water at the base and avoid overhead sprinkling.
Pruning Precision: When pinching suckers weekly, focus on removing those that form below the first flower cluster—these compete with fruit production. For the 6-8 ounce clusters mentioned in Step 4, I remove the smallest tomato to double the size of remaining fruit within 7-10 days. The zigzag trellis training isn't just about aesthetics; it distributes the 20-pound load evenly, preventing basket failure and stem breakage.
Pro Tips for Grow Hanging Tomato Plants
- Transforming small spaces into high-yield tomato gardens takes a few strategic moves—and avoiding common pitfalls.
- Container Selection: While 10-12 gallon fabric grow bags are ideal, I've found that double-walled bags with built-in drainage prevent root rot better than single-layer options.
- Sunlight Optimization: The 6-8 hours of direct sun requirement is non-negotiable, but here's the trick: rotate your baskets every 2-3 days to ensure even exposure.
Frequently asked questions
Got questions about growing hanging tomato plants? You’re not alone! Here are answers to the most common queries to help you grow juicy, 20-pound vines with confidence.
What’s the best time to plant hanging tomato seeds or seedlings?
Start indoors 6–8 weeks before your last frost date (typically March–April in most U.S. zones). Transplant after soil warms to 60°F+ and night temps stay above 50°F. For cooler climates, use heat-loving varieties like ‘Sungold’ or ‘Sweet Million’ and extend the season with row covers.
How long does it take for hanging tomatoes to produce fruit?
Expect 70–90 days from transplant for most varieties, but indeterminate types (like ‘Beefsteak’) can keep producing until frost. Patience pays off! Prune suckers early to redirect energy to fruit growth. In warm climates, you might harvest year-round with proper care.
Can I grow hanging tomatoes in containers other than traditional baskets?
Try fabric grow bags (great for drainage), 5-gallon buckets with holes, or even repurposed hanging planters. Just ensure the container holds at least 5 gallons per plant and has sturdy support. Window boxes work too—just add a trellis for vines to climb.
Why are my hanging tomato leaves yellowing or curling?
Yellow leaves often signal overwatering, nutrient deficiency (like nitrogen), or pests (e.g., spider mites). Check soil moisture—hanging pots dry faster. For curling, inspect undersides of leaves for pests; treat with neem oil if needed. Fertilize weekly with a balanced tomato feed (10-10-10) during flowering.
Do hanging tomatoes need extra heat or protection in cold weather?
Tomatoes hate cold—temperatures below 50°F stunt growth. Use row covers, cloches, or move pots indoors (near a sunny window) for short-term protection. In frost-prone areas, harvest before first frost or grow early-maturing varieties like ‘Tiny Tim’ (45 days). A black plastic mulch can also warm soil.
Wrapping up and next steps
Growing hanging tomato plants is a rewarding way to maximize space while enjoying juicy, vine-ripened fruit that weighs in at 20 pounds or more!
By choosing the right variety, providing sturdy support, and giving your plants the care they crave, you’ll turn even a small balcony or patio into a tomato-growing powerhouse. 🌱✨
Now that you’re armed with the know-how, roll up your sleeves and get planting!
Start with a single vine or go all out—either way, you’re just a few weeks away from harvesting homegrown tomatoes that’ll make your neighbors green with envy. Ready to dive in? Grab your supplies and let the growing adventure begin!